Background
This tutorial explains how to build a complete Ethereum dApp using React.js, web3Modal, ethers, and Hardhat. The dApp we built here is an open source carbon emissions trading application in greenhouse gas (GHG) emissions that cause climate change. In this dApp, emissions auditors can issue tokens of emissions to individuals and organizations, who could then buy Renewable Energy Certificates (REC’s) or carbon emissions offsets from dealers to offset their emissions.
You can see how the app works here:
Since everything we’re discussing here is open source, you can take a look at the code on GitHub while going through this tutorial. Open up the README in a new tab to reference for more detailed instructions if needed while following this guide.
General Overview
Developing a dApp follows a similar pattern to other applications, except a few concepts are handled differently:
- Instead of an account kept on a remote server, your user has an address for transactions on a public blockchain network or ledger. The address is a long series of hexadecimals starting with 0x.
- You don’t have to manage your users’ passwords on a server any more. Instead, each user’s address has a private key which the user, and only the user, knows. It’s their responsibility to secure it, not yours.
- Instead of users of connecting to a server for authentication, a wallet uses the user’s private key to prove their identity. For example, the MetaMask browser extension is a popular Ethereum wallet that we used for testing and development.
- Requests from users are not submitted through the browser to a remote server. Instead, the wallet signs the request, now known as a “transaction”, and sends it to the network.
- Your business logic does not run on a cloud server any more. Instead, the backend of your dApp is a smart contract which runs on a blockchain network.
Other than that, you’ll find a lot of what goes into a dApp familiar. There are still separate UI and backend or services layers. You’ll still need a development environment and automated tests. In our dApp, we used React for our web application; Hardhat for compiling, testing, and deploying; Ethers for interacting with Ethereum blockchains used on both the web application and Hardhat toolset; and web3modal for connecting the React application to a wallet via MetaMask.
The Ethereum Smart Contract
The heart of a dApp is the smart contract, which is contracts/NetEmissionsTokenNetwork.sol for us. At the very top, we declare that this smart contract will follow the ERC-1155 standard:
contract NetEmissionsTokenNetwork is ERC1155, AccessControl
The ERC-1155 standard is a multi-token standard which allow both fungible and non-fungible tokens. This supports the mix of token types in our emissions trading network with variable quantities, where some tokens can be traded and some cannot. For example, a token of the audit of your emissions cannot be traded. Carbon offsets and Renewable Energy Certificates (REC’s) can be traded until they are retired, and then they cannot be traded. ERC-1155 allows us to implement the fungible/divisible tokens similar to the ERC-20 standard and non-fungible/non-divisible tokens similar to the ERC-721 standard, and move between the two.
Some of the features that use ERC-1155 are the _mint function in issue(), _burn in retire(), and safeTransferFrom in transfer() for issuing, burning or retiring, and transferring tokens.
In addition we use some other features:
SafeMath – calculations protected from underflow/overflow
Counters – auto increment for the token id’s
AccessControl – assign roles to wallets. The roles are defined as byte32 at the top. The constructor is run when the contract is deployed and grants all the roles the msg.sender, which is the address deploying the contract. Then grantRole gives role, revokeRole removes it, and hasRole checks it throughout the code.
To connect to our smart contract, it must be compiled and deployed either to a local Ethereum network or a public mainnet or testnet. Later, we will show how to easily compile and deploy this contract to Hardhat Network.
Connecting the Smart Contract to React
In a typical web application, a user signs in, then uses a user interface which submits requests to a server. With a dApp, however, the user is signed in to a wallet such as MetaMask. Then requests are submitted to the wallet, which authenticates and submits them to the smart contract running on the network.
So to connect an application to your smart contract, you need to go through a wallet. In our case, this is done by web3modal. From our React.js web app located in the interface/packages/react-app/src/ directory, the App.js calls web3modal at the top:
import useWeb3Modal from "./hooks/useWeb3Modal"
const [provider, loadWeb3Modal, logoutOfWeb3Modal, signedInAddress, roles] = useWeb3Modal();
This calls useWeb3Modal.js, where at the bottom two calls for useEffect, loadWeb3Modal() and fetchRoles(), connect the wallet and fetch the roles. Then
return [provider, loadWeb3Modal, logoutOfWeb3Modal, signedInAddress, roles];
Returns the provider, functions to load and logout of web3modal, signed address, and roles (see above.)
Now we need to connect the app to the contracts. First, the addresses of the contracts are defined in interface/packages/contracts/src/addresses.js:
const addresses = {
  network: "Hardhat Network",
  tokenNetwork: {
    address: "0x5FbDB2315678afecb367f032d93F642f64180aa3"
  }
}
Then services/contract-functions.js creates services to call the contract functions. For example, in the issue() function, which issues tokens such as carbon offsets or REC’s:
let signer = w3provider.getSigner();
connects us to the wallet and gets the current connected account as the signer of the transaction using the provider for web3Modal.
let contract = new Contract(addresses.tokenNetwork.address, abis.netEmissionsTokenNetwork.abi, w3provider);
Returns the contract based on the address of contract and an ABI, or Application Binary Interface, which is an interface for the schema of the compiled Solidity contract that lists the available function of contracts and gas prices.
let signed = await contract.connect(signer);
connects the current wallet to the contract.
Finally,
await signed.issue(...)
Calls the contract to issue the token.
The user interface is located in the components/ directory. For example, components/issue-form.js has the form for calling the issue function. Most of this is the fields on the web UI, but when we get to the submit() function we see
let result = await issue(provider, address, tokenTypeId, quantity_formatted, fromDate, thruDate, automaticRetireDate, metadata, manifest, description);
The provider and address come from App.js, and the other fields are from the form displayed to the user.
Development Environment
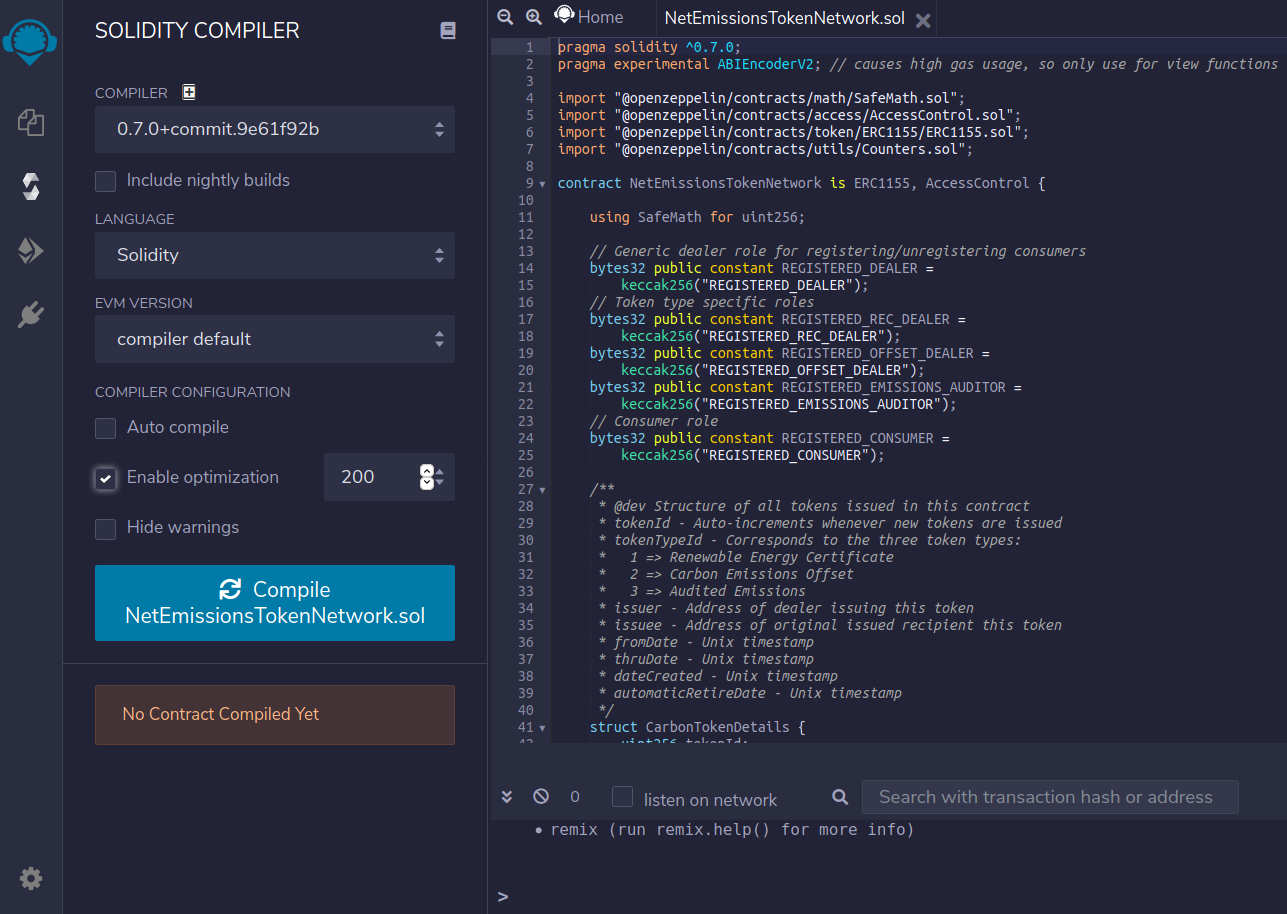
When working on the smart contract, we used the online Remix, which is an easy-to-use browser based IDE that could compile and run Solidity contracts, and Hardhat for compiling, testing, deploying, and running a local Ethereum node. After connecting the Remix IDE to the local machine with the remixd daemon, we set the compiler to the Solidity version we’re using (0.7.0) and set optimization to 200:
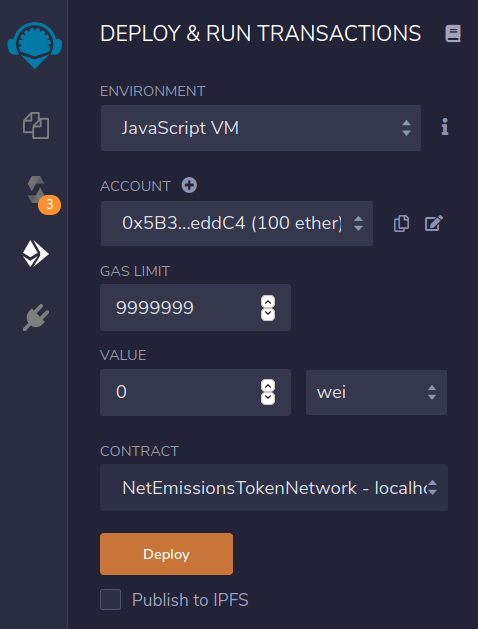
We can then deploy the contracts to a local testnet inside of Remix (here are the settings we used for our contract):
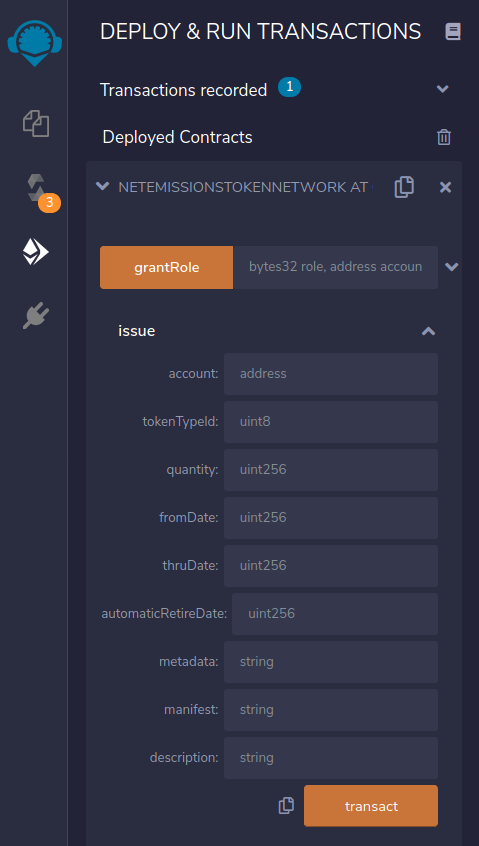
Then, we can scroll down to make contract calls using the test accounts provided in Remix and see the results in the console:

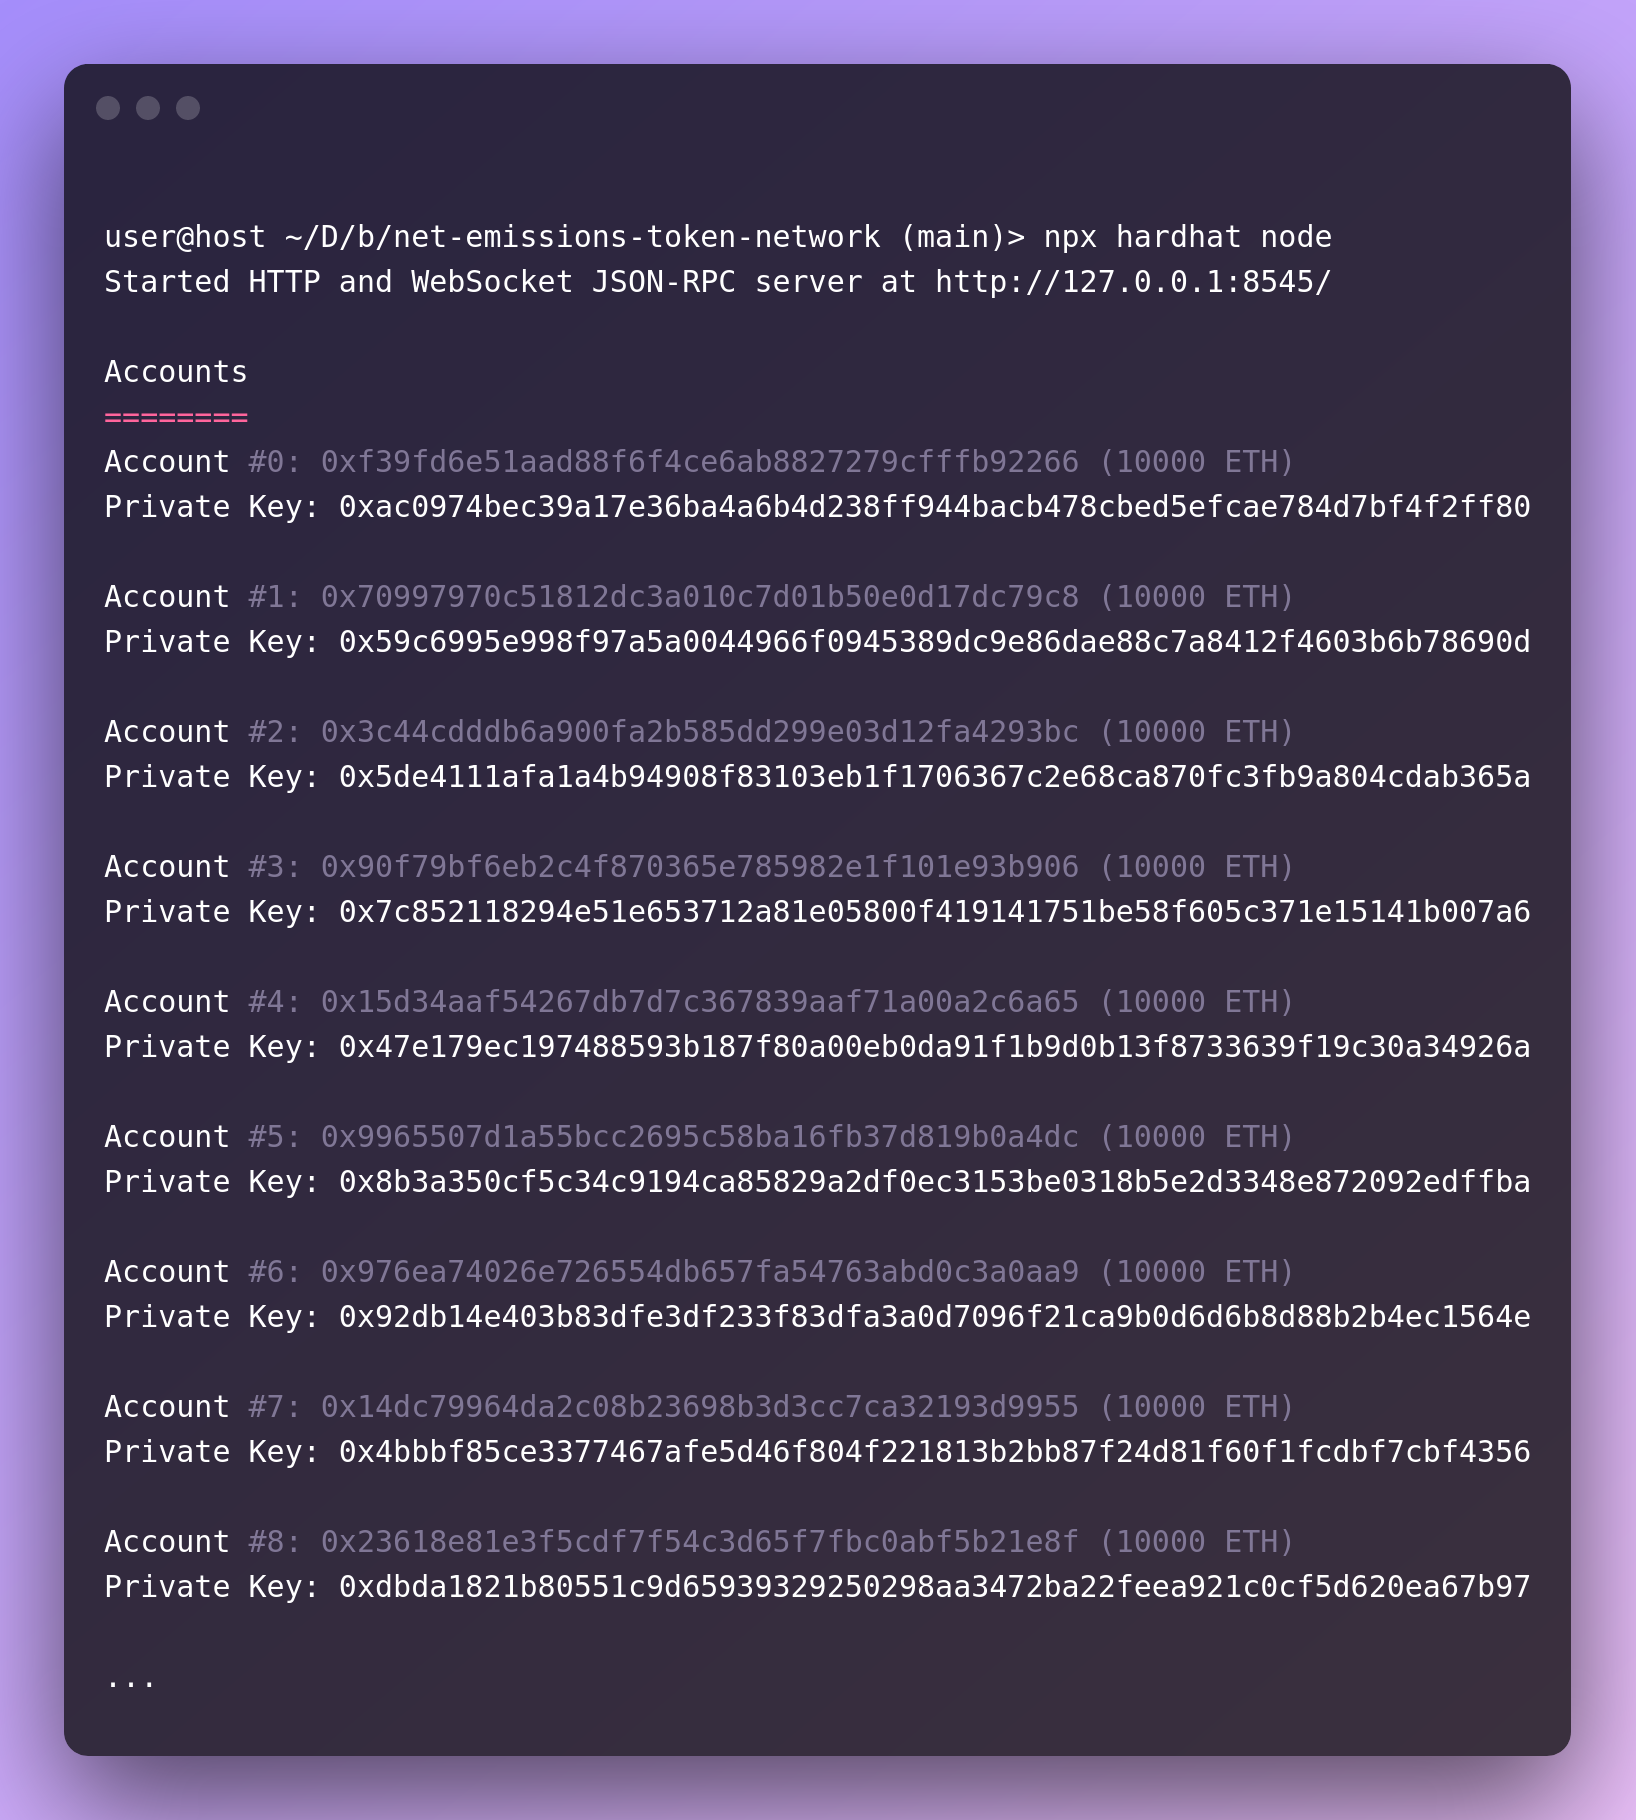
After saving the Solidity file (.sol) to contracts/NetEmissionsTokenNetwork.sol, we deployed it to a local Hardhat Network with
$ npx hardhat node
which created a local Ethereum testing instance. On start, Hardhat is set to create test accounts for you with public addresses and private keys (don’t use these with real funds though, since everyone has these private keys!):
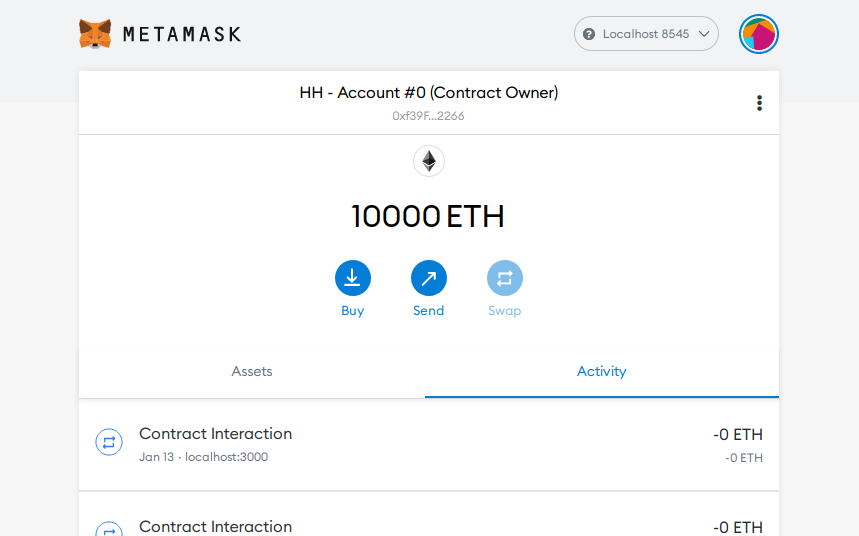
Once you connect MetaMask to your local instance, you’ll be able to import these accounts and use them for development by importing the private key (notice the matching address from Account #0 above):
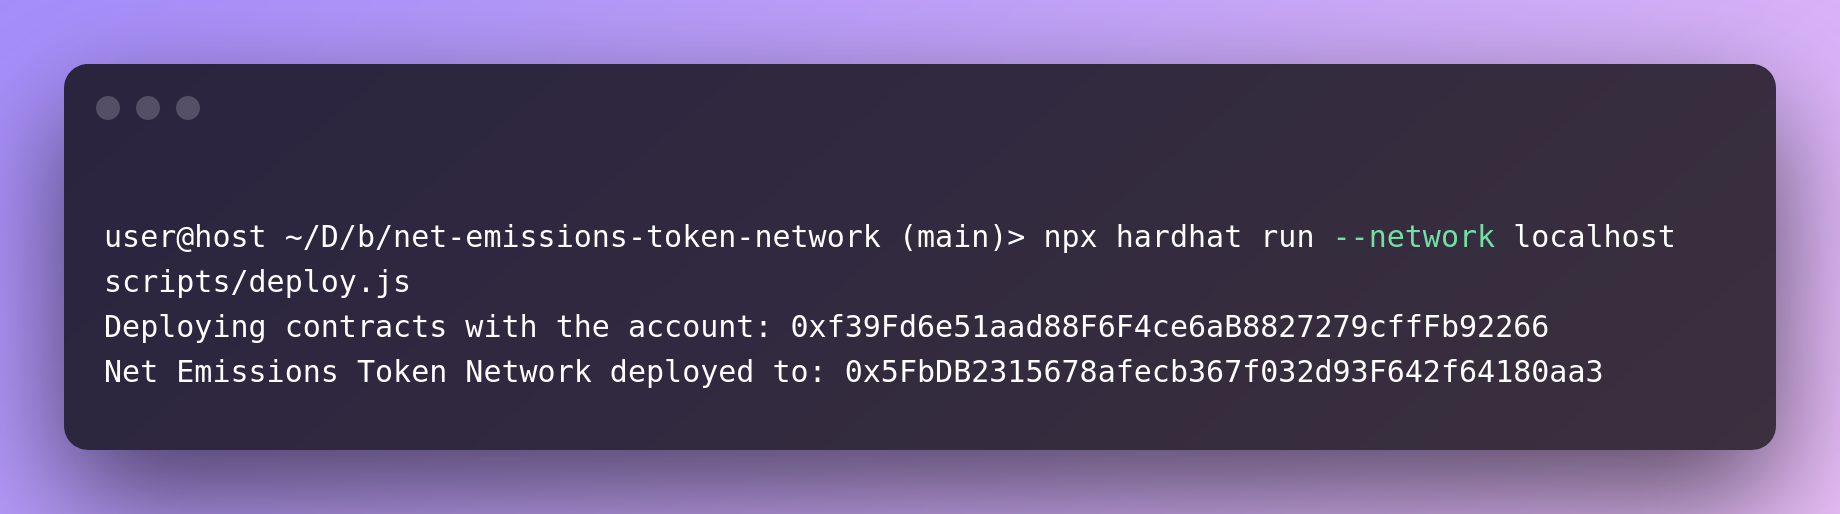
Now, we have our local Ethereum network running and our account(s) imported into MetaMask, but our contract is not yet deployed to it. We slightly modified the Hardhat template script to deploy with
$ npx hardhat run --network localhost scripts/deploy.js
(do this in a separate terminal while the Hardhat Network runs in your other one):
Once we squashed most of our bugs, we deployed the contract to the Goerli testnet (see our repository’s README for instructions on how to do this). This allowed us to try out our contract and dApp on a public network — just one step away from production deployment! Etherscan is a useful website for viewing and even interacting with public contracts especially as they support a few popular Ethereum testnets.
Automated Testing
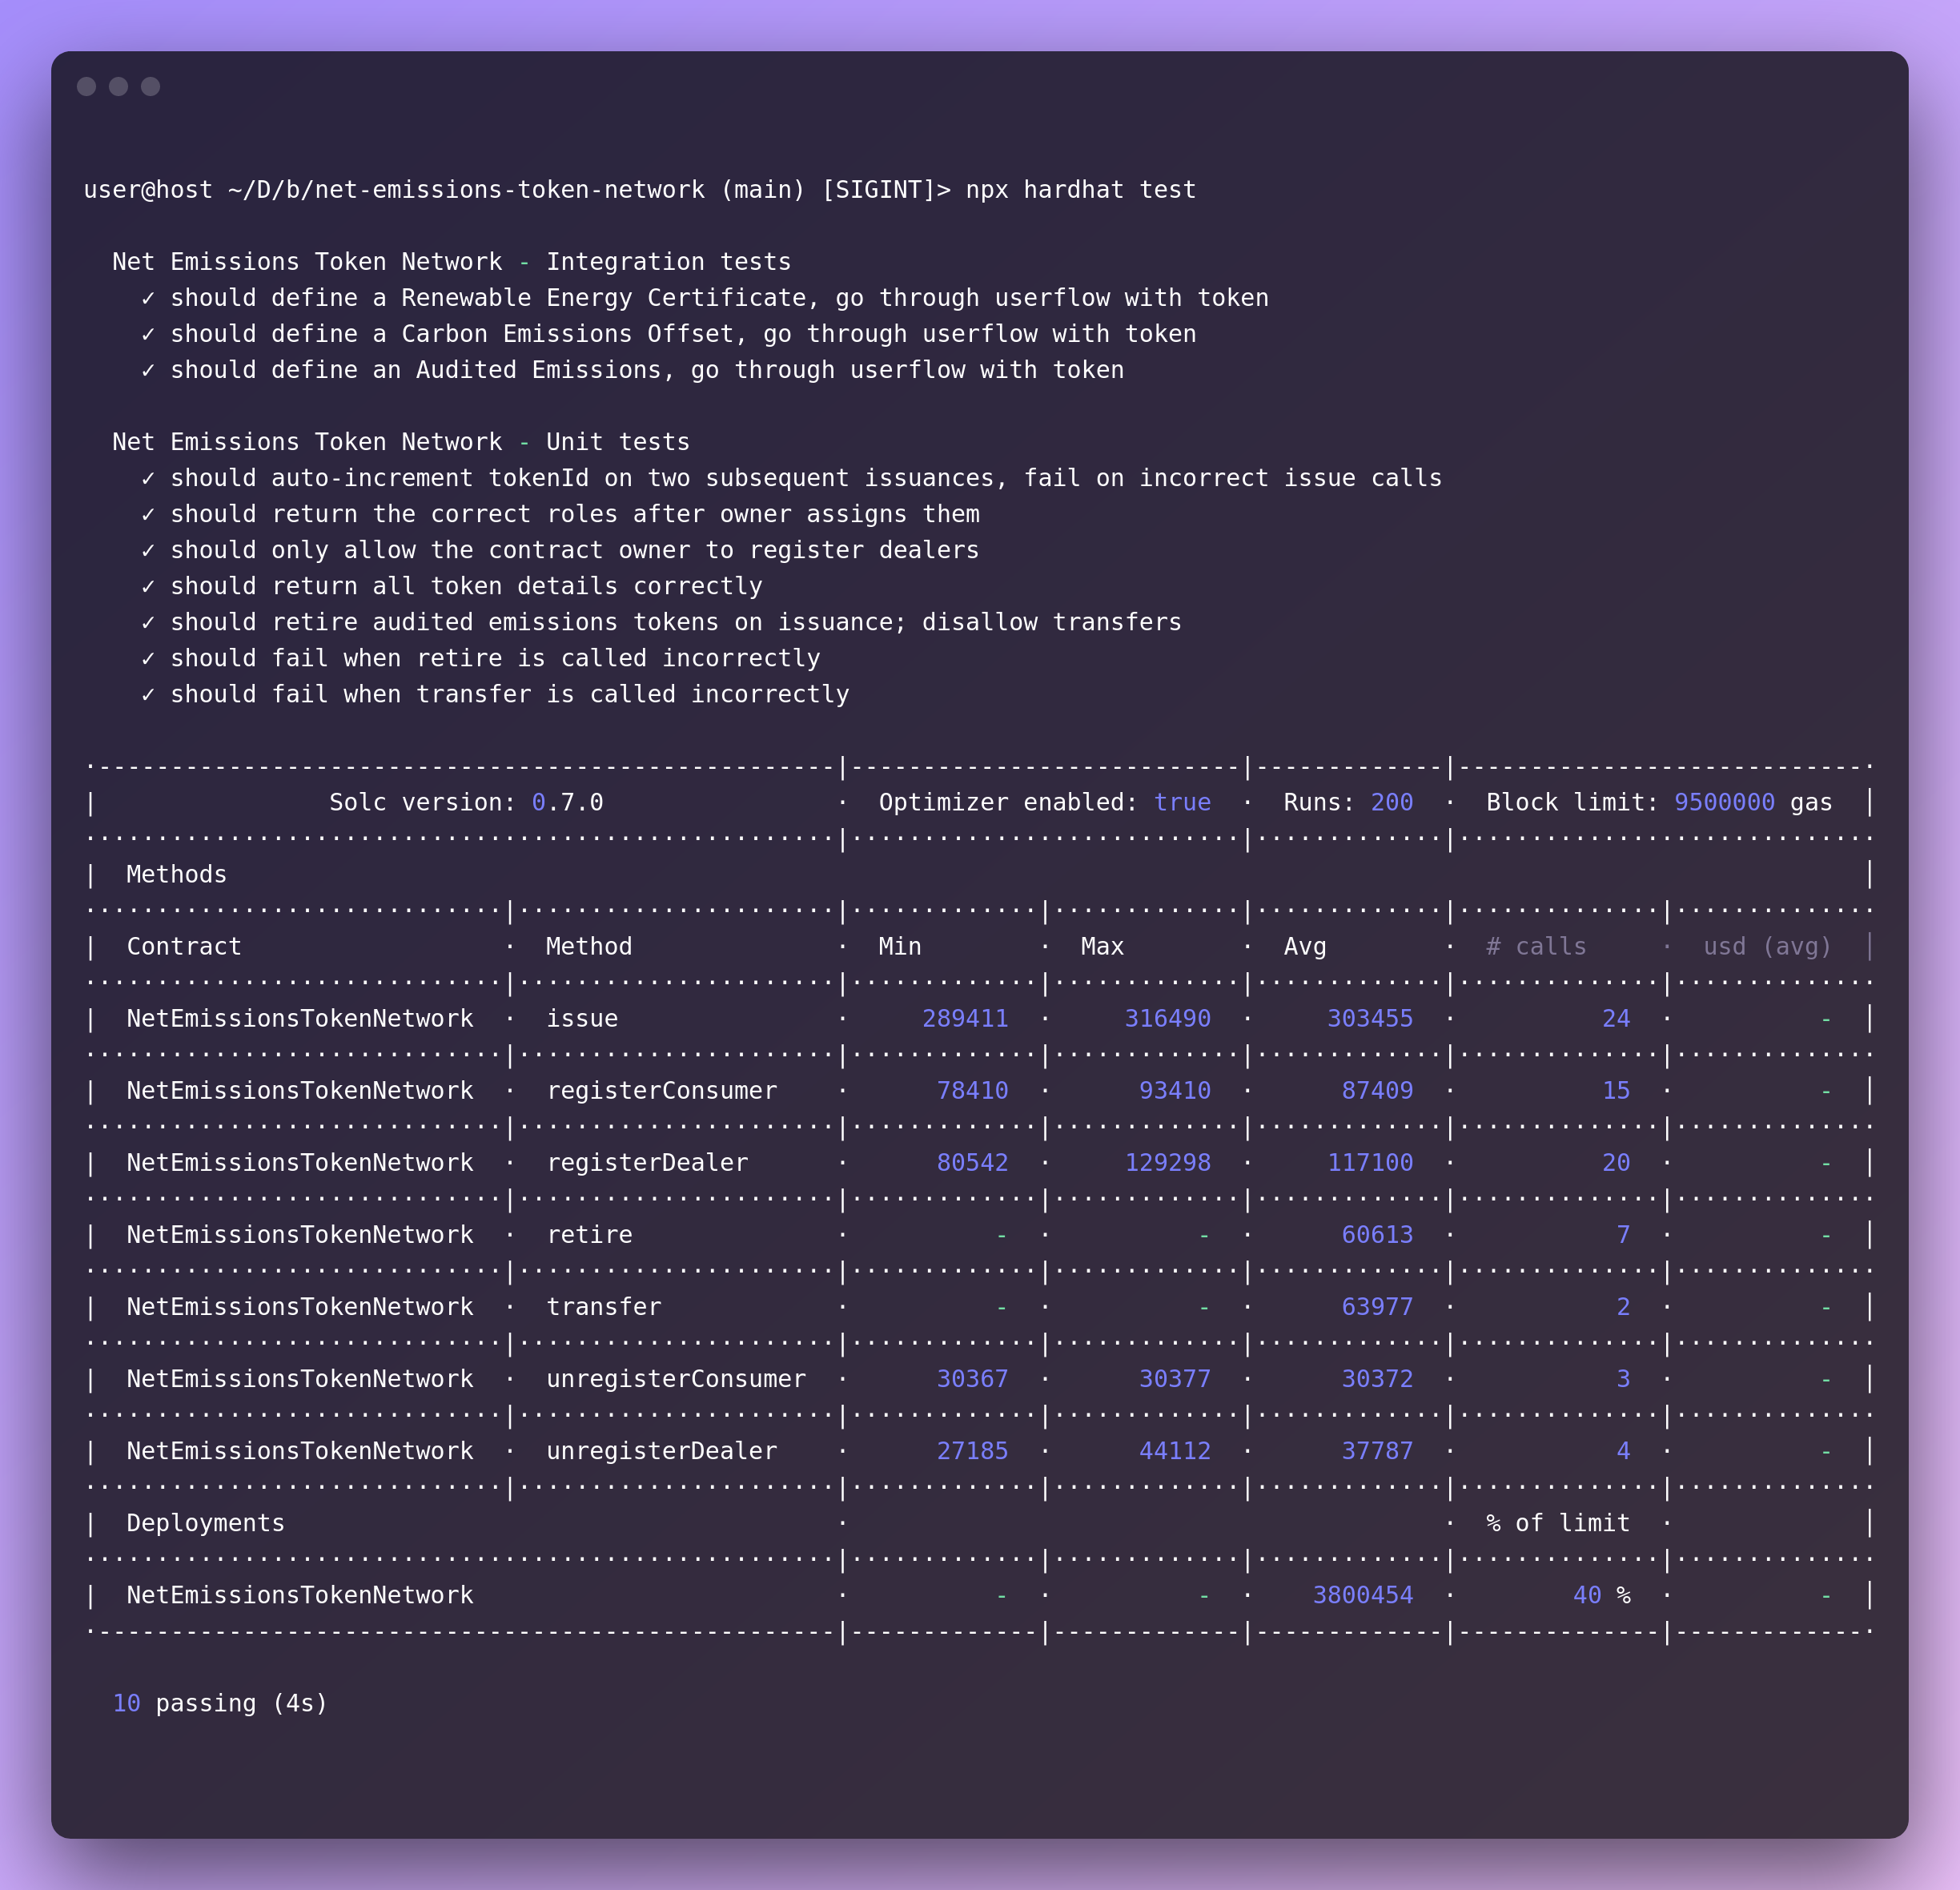
To test the contracts and basing our tests on the Hardhat template, we created two test files with Chai for integration tests and unit tests. The integration tests go through examples of some of the tasks each auditor might perform (using the generated addresses above), while the unit tests cover each function call and invalid function call. We also added a plugin that reports the required gas amounts. These tests can be run with
$ npx hardhat test
Next Step
Now that you understand how a dApp is built, go ahead and get the code to check it out yourself.
As for us, we’ll be connecting a DAO to this emissions tokens network, so a community could organize to fund climate offsets, purchase climate friendly projects, and invest in climate friendly companies. It’s all part of our operating system for climate action.
Sign up below or follow us at @opentaps on twitter to stay tuned!